Post polishing cleaning routines
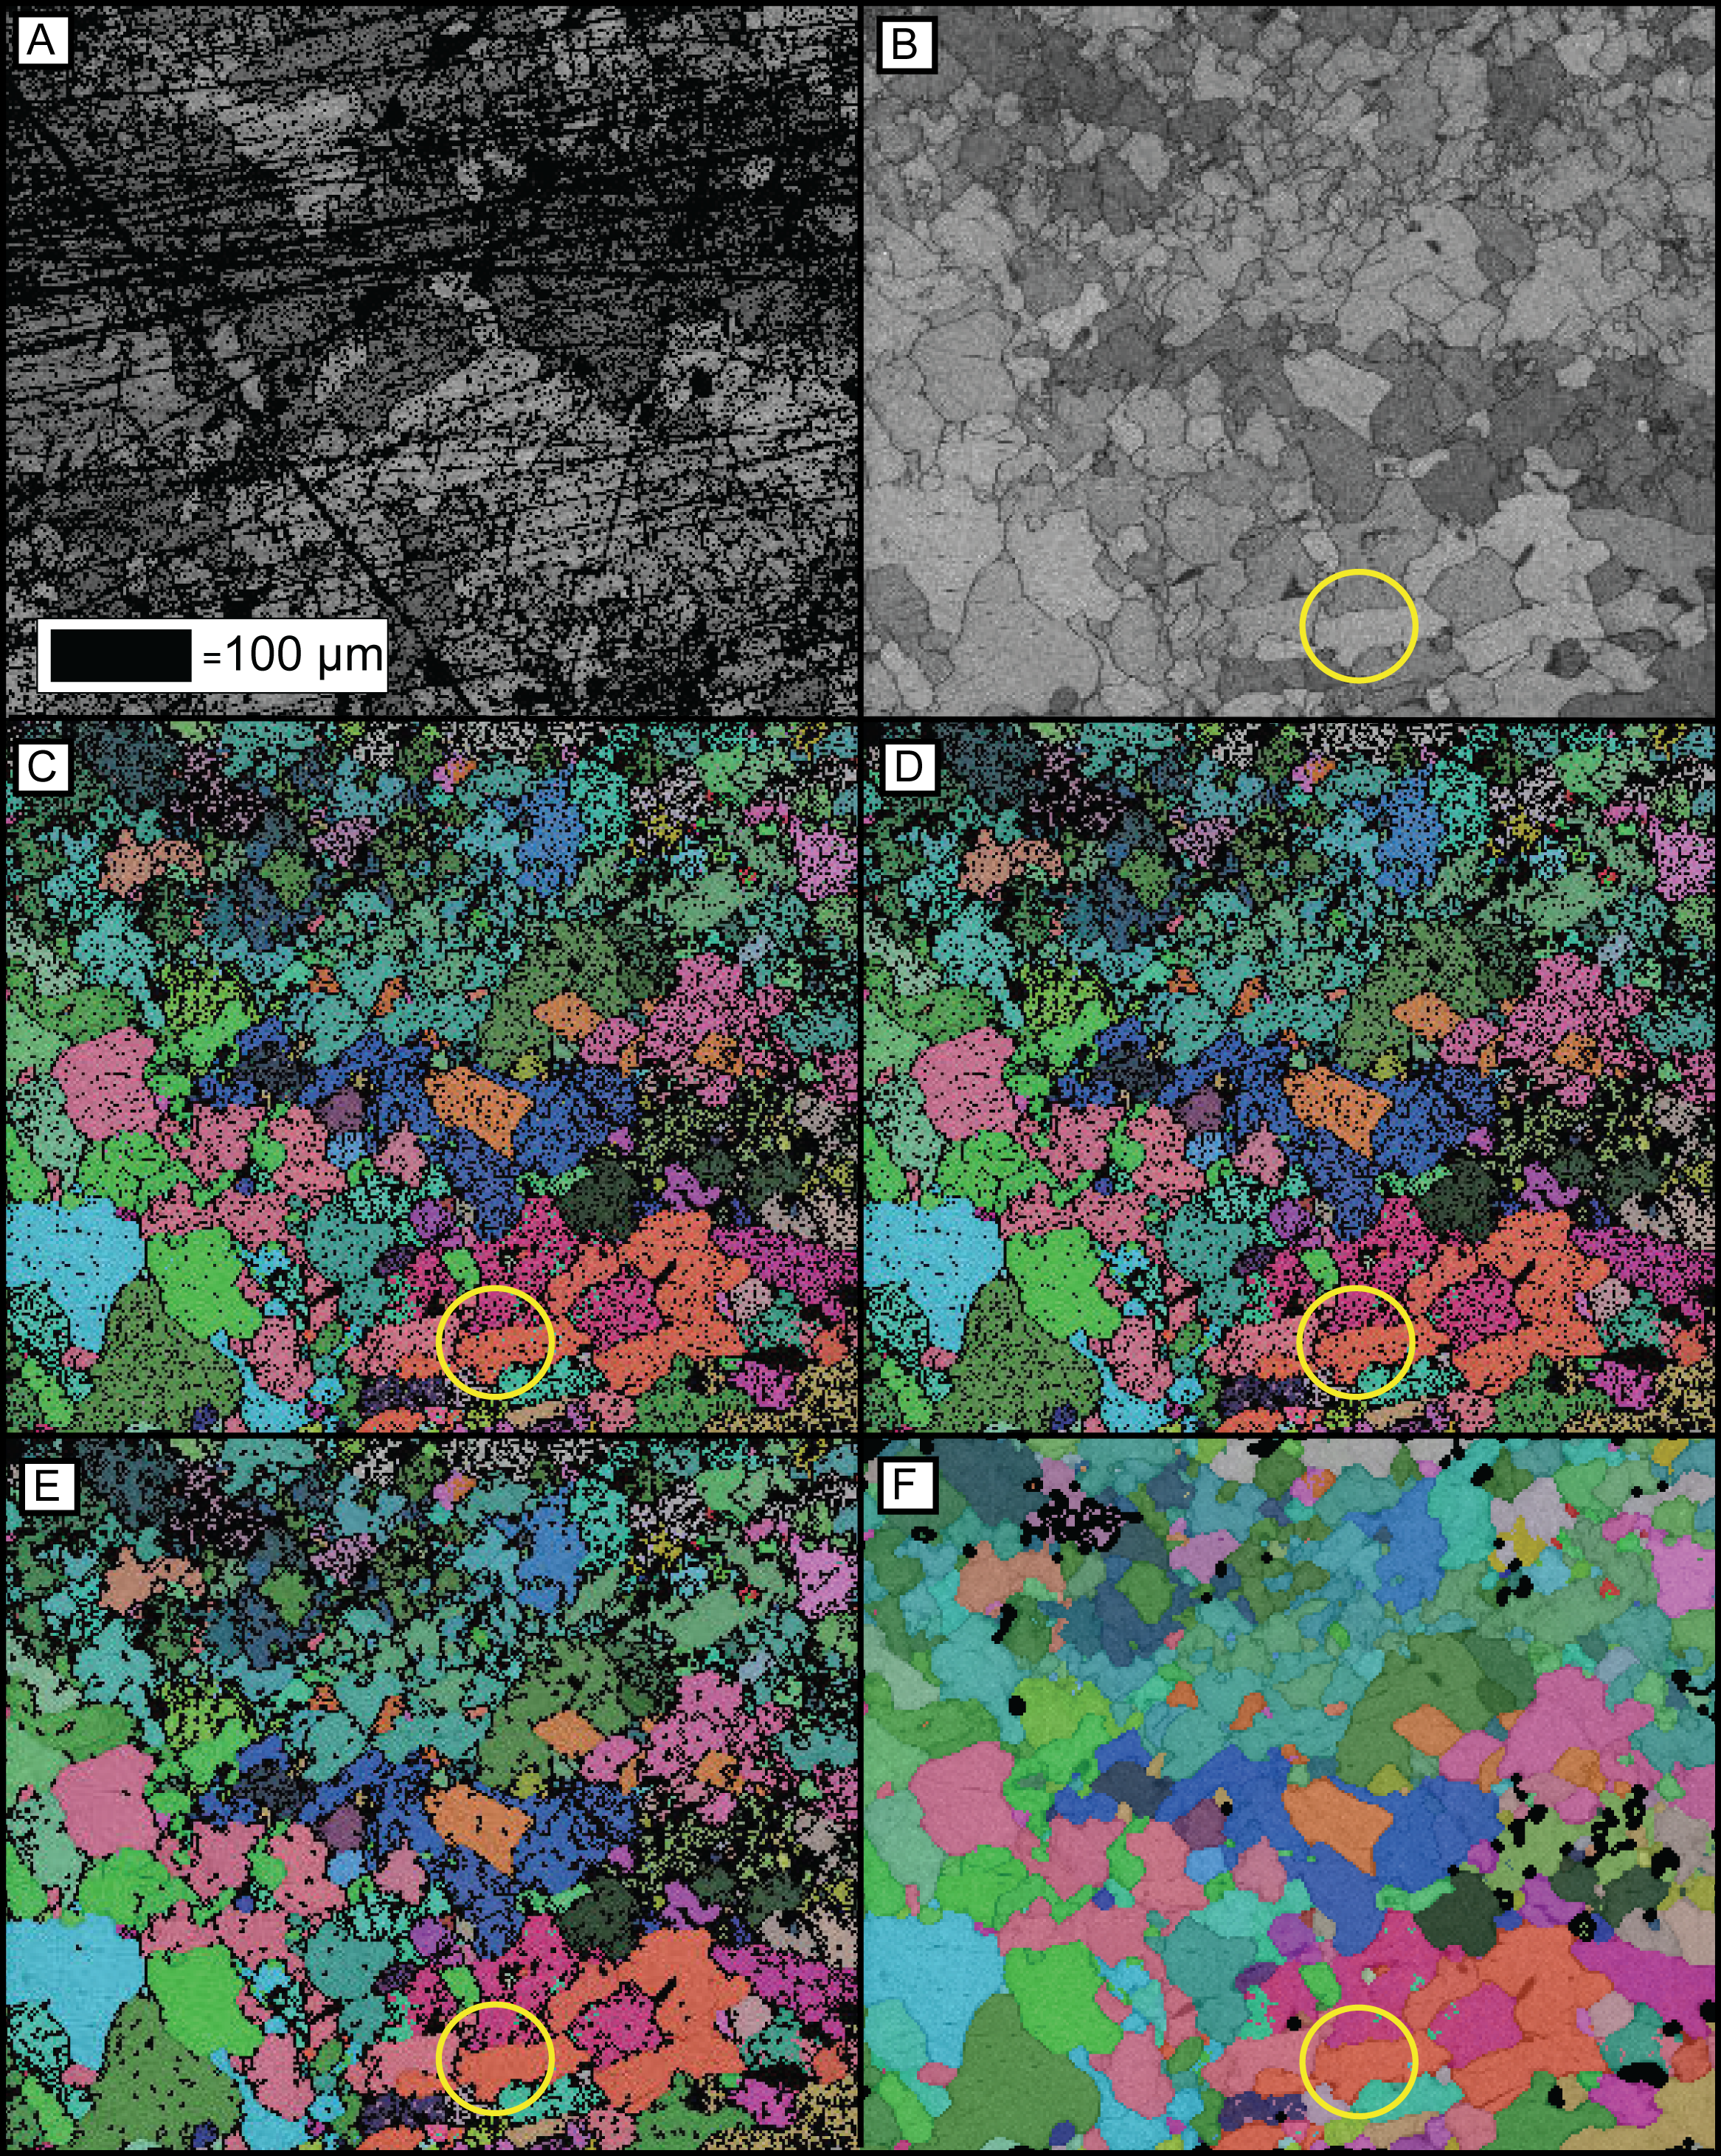
After the allotted polishing time, check the polished sample using reflected-light on an optical microscope for any polishing defects such as scratches and decide if the polish is as good as is achievable in a reasonable timeframe, if not continue with final stage polishing. Figure 1a & b illustrates the difference between a poorly polished surface (Fig. 1a) and a well polished surface (Fig. 1b). It is important to thoroughly clean the sample surface to remove any contamination. The sample should be rinsed under cold water, placed into a small beaker of water, and then deposited into an ultrasonic cleaner for approximately ten minutes. This will remove some of the polishing solution particles that have become embedded into the sample. The sample can then be removed from the ultrasonic cleaner and dried using lint free tissues. Another cleaning method is to wipe the surface with ethanol and then allow it to evaporate taking dirt and grease particles with it or dry it using a hot-air dryer. The sample should then be blown off using an inert aerosol spray such as dust off to remove loose particles still attached to the surface of the sample.
Figure 1. The effects of polishing and data processing

(a) Is an example of a poorly polished sample surface. (b) Is a well polished sample surface where all grains and their boundaries are clear. This sample is used for remaining figures (c) The raw EBSD data for an experimentally deformed calcite sample. (d) shows how the wildspikes data processing technique removes erroneous single data points. Compare the area inside the yellow circle between c and d and the green single pixels have been removed. (e) shows the data after growth to completion based on 8 and 7 neighbours. (f) shows the final data after processing is complete.